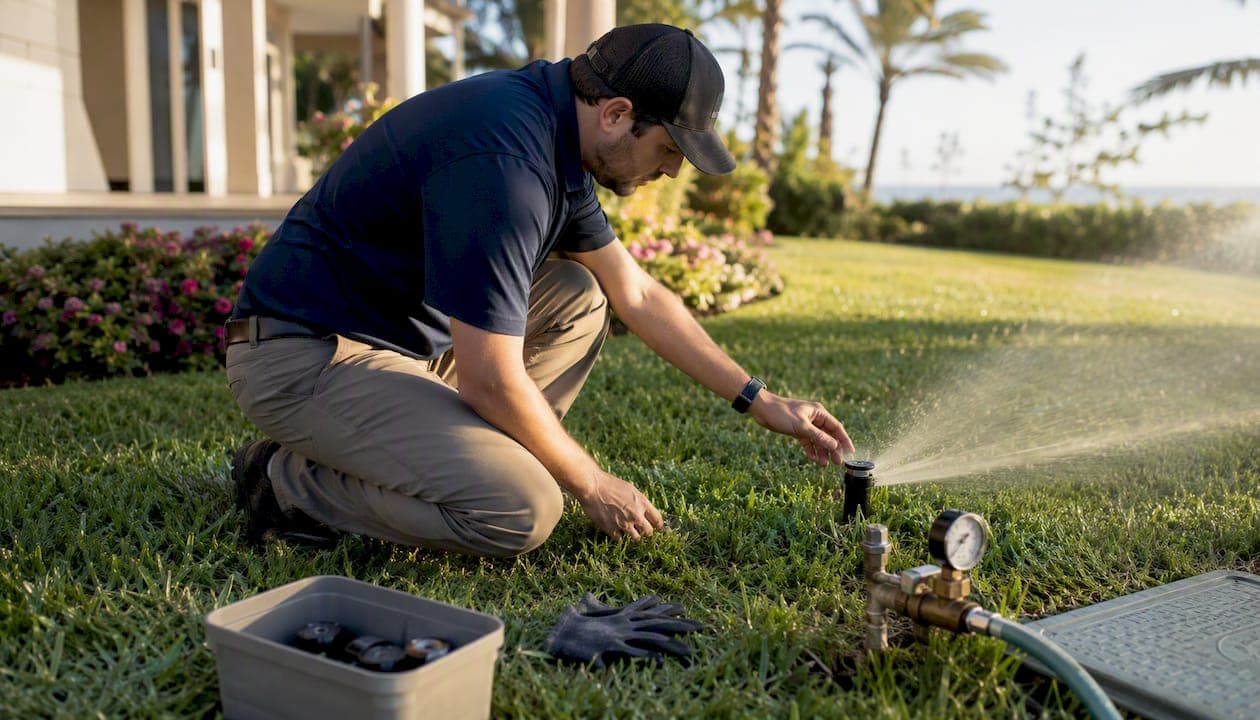
Inspect and run every irrigation zone at least once a month, complete seasonal startup and shutdown tasks, and verify coverage and pressure at least twice a year. That rhythm catches the problems that turn a $15 nozzle replacement into a $1,500 landscape repair. The OSU Extension Service puts it plainly: routine inspections prevent costly mechanical failures, maintain uniform application, reduce energy use, and catch pump, pipeline, and valve problems before they escalate.
Start here — your immediate action list:
- Run each zone manually and walk the property while it runs
- Look for pooling, soggy patches, or dry spots that don't match the zone layout
- Check that every head pops up fully and retracts after the zone shuts off
- Note any misting, weak arcs, or heads spraying pavement instead of turf
- Confirm your controller schedule matches the current season (not last summer's settings)
- Inspect valve boxes for standing water, root intrusion, or corroded wiring
The EPA WaterSense program and university extension guidance from institutions like the University of Arizona Cooperative Extension both confirm that these basic checks, done consistently, are what separate a system that lasts 20-plus years from one that quietly wastes hundreds of gallons a week. The ALCA's ACIT Irrigation Maintenance Checklist recommends wet-runs as the single most reliable method for catching clogged nozzles, misaligned heads, and dry spots early.
Key Takeaways
Consistent monthly wet-runs, seasonal startup and shutdown tasks, and pressure checks within the correct PSI range for your head type are the three practices that prevent the majority of costly irrigation failures.
| Point | Details |
|---|---|
| Monthly wet-runs are non-negotiable | Walk every zone while it runs to catch clogs, misalignment, and leaks before they compound. |
| PSI targets vary by head type | Rotary heads need 30–50 PSI; pop-up sprays need 20–30 PSI; drip systems need 15–25 PSI. |
| Adjust your controller every month | Static schedules cause overwatering in cool months and underwatering in peak summer; smart controllers automate this. |
| Document every inspection | A photo log and written record make contractor oversight and year-over-year comparisons possible. |
| 30apropertycollective | Provides recurring wet-runs, digital inspection reports, and vendor oversight for Emerald Coast estate owners. |
Table of Contents
- What does a seasonal irrigation system maintenance schedule look like?
- What tools and parts do you need for routine sprinkler upkeep?
- How to run a monthly inspection and catch problems early
- How to test coverage and check water pressure by system type
- How to clean heads, nozzles, and filters and flush your lines
- How to winterize your irrigation system safely
- Drip irrigation maintenance is different from sprinkler care
- Troubleshooting common irrigation problems
- What does irrigation repair and professional service cost?
- Practical upgrades that reduce water use and cut maintenance
- Your printable irrigation maintenance checklist and log template
- How professional estate management raises the standard of irrigation care
- What most irrigation advice gets wrong
- 30apropertycollective keeps your irrigation running year-round
- Sources
What does a seasonal irrigation system maintenance schedule look like?
A clear calendar removes the guesswork. The tasks below follow a four-season structure, but the timing shifts by climate. In Florida and the Gulf Coast, "winter" prep happens in November rather than October, and full blowouts are rarely needed. Pair this with your home maintenance seasonal checklist for a complete property rhythm.
Spring startup (March through April)
| Task | Notes |
|---|---|
| Inspect all heads and nozzles | Replace cracked bodies and clogged nozzles |
| Open mainline slowly | Fill over 1–2 days to prevent water hammer |
| Check backflow preventer | Test and certify per local code if required |
| Verify controller date, time, and program | Reset after any power outage |
| Run full wet-run zone by zone | Walk each zone; note anomalies |
| Test coverage with catch cans | Identify dry spots and uneven distribution |
| Inspect valve boxes and wiring | Look for root intrusion and corroded splices |
| Clean filters and screens | Flush sediment from inline filters |
Summer tuning (May through August)
Adjust controller run times monthly as evapotranspiration (ET) climbs. The ALCA checklist is direct: controller programs should be adjusted monthly, or you should use a smart controller that pulls ET data automatically. Run a quick wet-run mid-season to catch heads knocked out of alignment by mowing equipment. Check drip emitters after any heavy rain event, since debris washes into lines.
Fall prep (September through October)
- Reduce controller run times as temperatures drop and ET decreases
- Flush drip laterals before cooler weather slows biological activity
- Inspect and clean filter cartridges
- Check valve boxes for standing water after summer storms
- Confirm backflow preventer is functioning before the first cold snap
Winter and mild-climate alternatives (November through February)
In freeze-prone climates, winterization with compressed air is the standard approach (full procedure in Section 7). In frost-free or mild climates like coastal Florida, skip the blowout and instead flush filters, clean emitters, lower controller schedules to match reduced plant demand, and inspect backflow preventers. The OSU Extension Service confirms this approach: mild-climate winter prep focuses on flushing, cleaning filters, and recalibrating controllers rather than pneumatic blowouts.
Pro Tip: If you don't have a smart controller, set a recurring monthly calendar reminder to check your controller program. A schedule set in July can easily overwater in October, promoting fungal disease and wasting water. ET-based smart controllers like Rain Bird's ESP-TM2 or Hunter's Hydrawise handle this automatically.
What tools and parts do you need for routine sprinkler upkeep?
Getting the right gear together before you start saves two extra trips to the hardware store. Most of what you need costs under $50 total.
Essential tools:
- Pressure gauge (hose-thread fitting, 0–100 PSI range)
- Flat-head and Phillips screwdrivers
- Needle-nose pliers (for pulling nozzle screens)
- Rotor adjustment tool (usually included with Hunter or Rain Bird rotors)
- Catch cans or small tuna cans (6–8 for a coverage test)
- Measuring tape
- Drain key or quick-coupler key (if your system uses quick couplers)
- Teflon tape and pipe thread sealant
Recommended spare parts to keep on hand:
- Replacement nozzles matched to your existing heads (rotary, fixed, or MP Rotator)
- 2–3 spare sprinkler bodies in the head types your system uses
- Valve box covers (they crack in UV exposure)
- Inline filter cartridges or screen filters
- Drip emitters in your standard flow rate (1 GPH, 2 GPH)
- Goof plugs and barbed fittings for drip tubing repairs
What to rent, not buy: A gas-powered air compressor large enough for a proper blowout (typically 10–20 CFM at 50 PSI) is worth renting rather than buying for most homeowners. A small pancake compressor from a home center does not deliver enough volume to clear lateral lines safely.
What to leave to a licensed professional: Backflow preventer testing and certification, pump motor repairs, buried mainline breaks, and any work touching the electrical panel or low-voltage controller wiring beyond a simple battery swap.
Pro Tip: Label your valve box locations with a simple hand-drawn map and keep it with your controller manual. When a contractor or estate manager needs to find valve box 4 at 7 AM, a labeled sketch saves 20 minutes of probing the lawn.
How to run a monthly inspection and catch problems early
A thorough walk-through takes 20–45 minutes depending on property size. The Western Water CA Irrigation Maintenance Checklist recommends checking heads for clogs and alignment, verifying PSI by sprinkler type, and using catch-can tests to confirm even distribution. Here is the sequence that works.
- Start at the controller. Confirm the date, time, and active program. Check the battery backup. Note the last run time.
- Run zone 1 manually. Walk the full zone while it runs. Don't watch from the porch.
- Inspect every head in the zone. Is it popping up fully? Retracting cleanly? Rotating through its full arc? Spraying the intended area?
- Look at the soil surface. Pooling near a head usually means a cracked body or a slow-infiltration soil problem. A dry arc in the middle of a zone often means a clogged nozzle or a head that's sunk below grade.
- Shut off zone 1 and move to zone 2. Repeat for every zone.
- After all zones run, check valve boxes. Open each lid and look for standing water, root intrusion, and corroded wire splices.
- Inspect the backflow preventer. Look for drips, corrosion, or handles turned to the wrong position.
- Record what you found. Even a note in your phone with the zone number and the problem is enough to hand off to a technician.
Troubleshooting clues to know:
- Misting or fogging from a head: pressure is too high, or you have a misting nozzle in a high-pressure zone. Check PSI at the zone valve.
- Puddling that doesn't drain: either a broken lateral is leaking underground, or the soil infiltration rate is too slow for the applied rate. Run a shorter cycle and check again.
- One head not popping up: clogged inlet screen or a broken riser. Pull the head and inspect.
- Wet spot between heads with no head nearby: likely a lateral line leak. Mark it and schedule repair.
Urgent issues that need same-week attention: a broken mainline (water running when the system is off), a backflow preventer that is dripping continuously, or any head spraying directly onto a structure foundation. A temporary fix for a broken head is to cap the riser with a threaded cap while you wait for parts. Never leave a broken head open and running.
How to test coverage and check water pressure by system type
The catch-can test is the most practical way to find out whether your system is actually watering evenly, and it takes less than an hour. Distribution uniformity (DU) testing with professional catch cans is more precise than the tuna-can approximation, but for homeowners, the tuna-can method gives a clear enough picture to identify problem zones.
Running a catch-can coverage test:
- Place 6–8 catch cans (or identical tuna cans) in a grid pattern across one zone. Space them evenly, roughly 5 feet apart.
- Run the zone for 15 minutes.
- Measure the depth of water in each can with a ruler.
- Compare the readings. A well-designed zone should show less than a 25% difference between the lowest and highest can.
- Dry spots correspond to low-volume cans. Soggy areas correspond to high-volume cans.
- Repeat for each zone.
Checking water pressure:
Attach a pressure gauge to the hose bib closest to your irrigation mainline connection. Read static pressure (system off) and then operating pressure (one zone running). Static pressure above 80 PSI is a signal to install a pressure-reducing valve before it damages heads and nozzles. Operating pressure that drops more than 10–15 PSI below static when a zone runs can indicate a partially closed valve, a clogged filter, or a mainline restriction.
PSI targets by irrigation type:
| System type | Target operating PSI | What happens outside range |
|---|---|---|
| Rotary sprinklers | 30–50 PSI | Below 30: short throw, dry edges. Above 50: misting, drift |
| Pop-up spray heads | 20–30 PSI | Below 20: incomplete arc. Above 30: misting, overspray |
| Drip irrigation | 15–25 PSI | Below 15: uneven flow. Above 25: emitter blowouts |
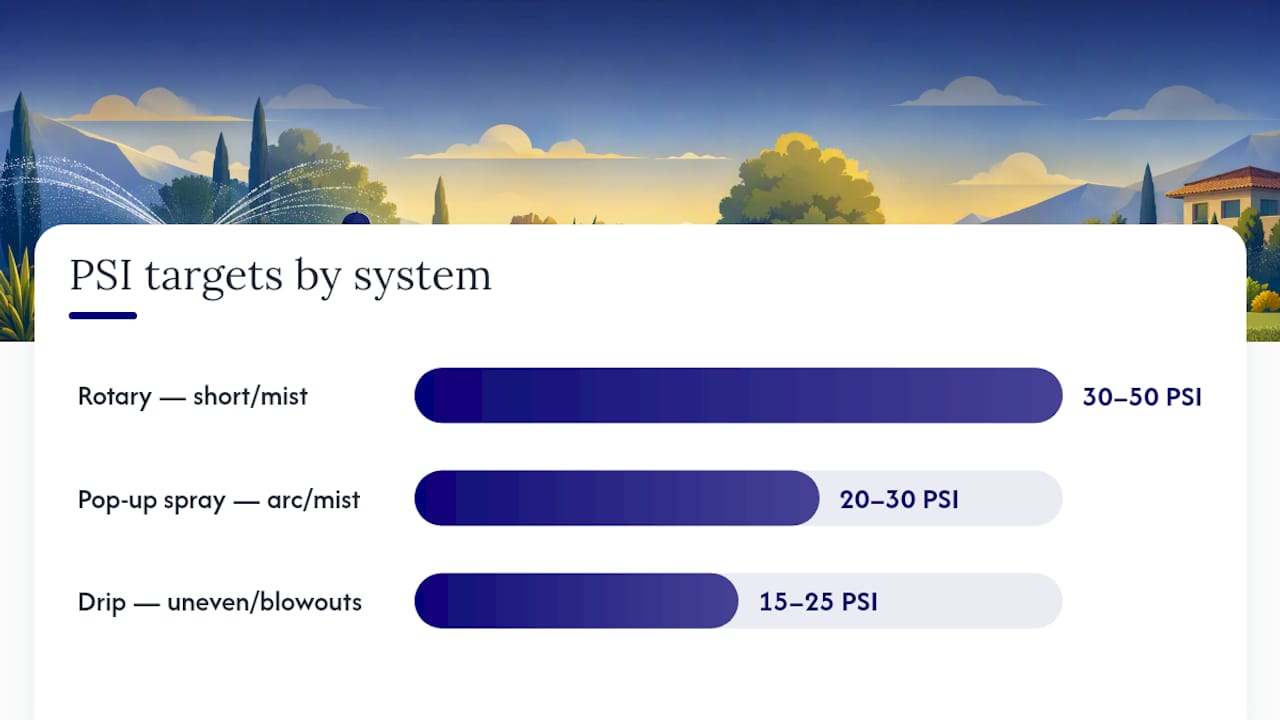
The PSI ranges above are background guidance widely cited in irrigation industry references. Operating outside these ranges consistently shortens component life and wastes water.
Pro Tip: Never mix rotary heads and fixed spray heads on the same valve zone. Rotors apply water at roughly 0.4 inches per hour; fixed sprays apply it at 1.5–2 inches per hour. Running them together means the spray area floods while the rotor area stays dry. The ALCA checklist flags this as one of the most common distribution uniformity failures. Re-zone or replace with matched-precipitation nozzles.
How to clean heads, nozzles, and filters and flush your lines
Cleaning is the maintenance task most homeowners skip, and it's the one that most directly determines whether a system lasts 10 years or 25. The University of Arizona Cooperative Extension recommends regular filter maintenance and periodic flushing as core practices for both drip and sprinkler systems.
Cleaning nozzles and screens:
- Turn off the zone valve manually before pulling any head.
- Unscrew the nozzle from the head body. Most pop-up nozzles twist off counterclockwise.
- Remove the inlet screen with needle-nose pliers. Rinse under running water. If mineral scale is visible, soak in white vinegar for 15 minutes.
- Inspect the nozzle orifice. Hold it up to light. If the opening is deformed or partially blocked, replace the nozzle rather than trying to clear it.
- Re-seat the screen and thread the nozzle back in. Hand-tight is enough.
- Restore the zone and check the spray pattern.
Do this for every head at spring startup and again mid-season if you notice uneven coverage. Inline filter cartridges (common on drip systems and some mainlines) should be pulled and rinsed at the same intervals.
Flushing mains and laterals:
Flush after any repair that opened a line. Debris enters every time you cut a pipe. The sequence: open the end cap or flush valve at the far end of the lateral, then open the zone valve slowly. Let water run for 60–90 seconds until it runs clear. Close the end cap, then close the zone valve. Never flush with the end cap on, or you push debris into emitters and nozzles.
Drip system treatments:
- Mineral scale (white crust on emitters): flush with a dilute acid solution per the manufacturer's guidance. Citric acid or phosphoric acid products are common. Follow label safety instructions and flush thoroughly with clean water afterward.
- Organic fouling (slime, algae): a dilute hydrogen peroxide solution flushed through the system addresses biological buildup. The University of Arizona Cooperative Extension recommends periodic chemical treatments for both mineral scale and organic fouling in drip systems.
Safety note: Always isolate the zone electrically at the controller before disassembling valve components. Never work on a solenoid valve with the zone energized.
Pro Tip: Keep a small parts tray (a silicone baking mat works well) under any head you're cleaning. Nozzle screens are tiny and disappear in grass instantly. One lost screen means a clogged head within a week.
How to winterize your irrigation system safely
Winterization protects your system from freeze damage, and the single most important number to know is 50 PSI. The OSU Extension Service is explicit: do not exceed 50 PSI during a compressed-air blowout. Exceeding that threshold can shatter PVC fittings, damage rotor internals, and create a dangerous projectile risk at open heads.
Compressed-air blowout procedure:
- Shut off the mainline water supply to the irrigation system.
- Connect the air compressor to the system's blow-out port or a quick-coupler valve. Use a compressor rated for at least 10–20 CFM at 50 PSI for residential systems.
- Activate the zone farthest from the compressor connection at the controller.
- Open the compressor valve slowly. Watch the operating pressure. Keep it at or below 50 PSI.
- Run each zone for 20–30 seconds, until no water exits the heads. Do not run a zone dry for more than 30 seconds — rotor heads can overheat without water for lubrication.
- Repeat for each zone, working from farthest to closest.
- After all zones are cleared, shut off the compressor and release any remaining air pressure through the blow-out port.
- Insulate the backflow preventer and any above-ground components with foam pipe wrap.
Common mistakes that cause damage:
- Running a single zone for too long (overheating rotors)
- Using a compressor with insufficient CFM (leaves water in the lines)
- Skipping the zone farthest from the connection (trapped water freezes there first)
- Forgetting to drain the backflow preventer
Mild-climate alternative (frost-free zones):
For properties along coastal Florida and similar climates, a full blowout can actually harm the system by introducing dry-run heat into rotors that don't need it. Instead:
- Flush all filters and clean emitters
- Lower controller schedules to match reduced winter ET
- Inspect and service the backflow preventer
- Check valve boxes for standing water from fall rains
- Confirm all drain valves are functional
When to hire a professional for winterization: large systems with pump stations, systems with complex manifold configurations, or any situation where you're not certain of the system layout. A qualified irrigation technician charges a flat fee for a blowout that's typically far less than a single freeze-damaged mainline repair.
Drip irrigation maintenance is different from sprinkler care
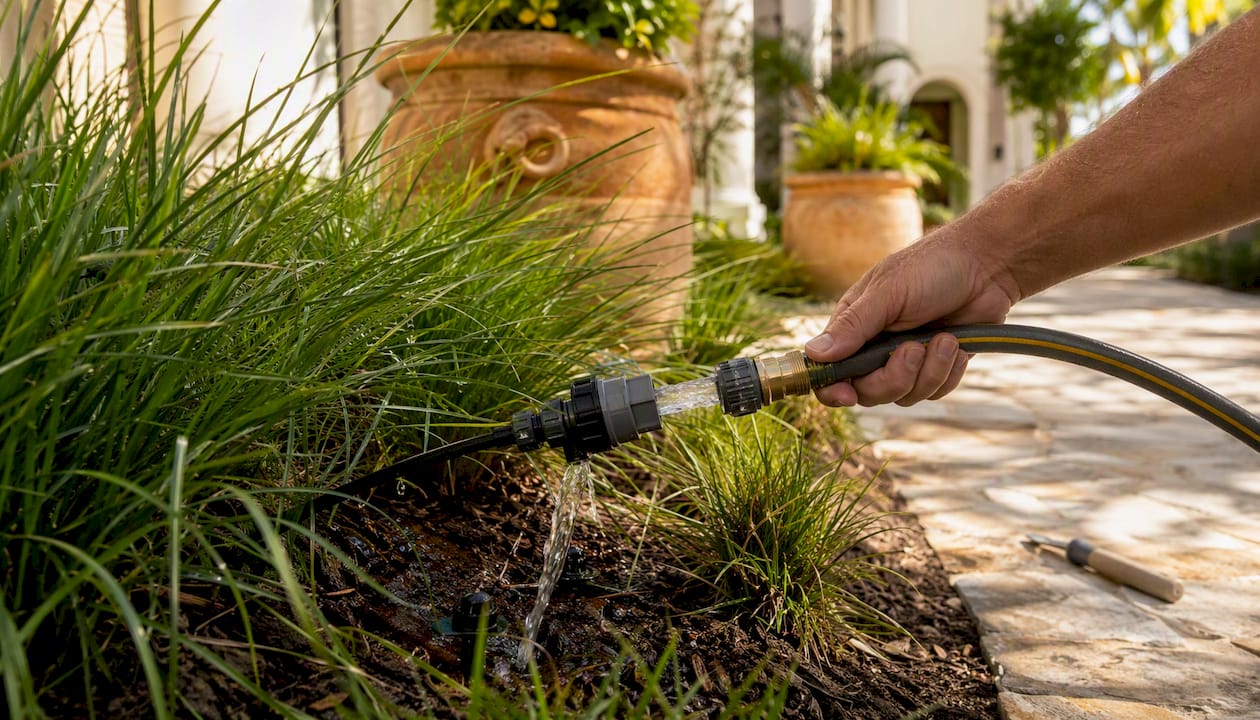
Drip systems are quieter about their failures. A broken sprinkler head is obvious. A clogged drip emitter just means one plant gets less water, and you might not notice for weeks. The University of Arizona Cooperative Extension notes that well-maintained drip systems can last decades, but only with consistent pressure checks, filter care, and flushing.
Weekly and seasonal drip tasks:
- After each run, walk the drip zones and look for emitters that are dry, pooling, or missing
- Check pressure at the zone inlet with a gauge. Drip systems run at 15–25 PSI; higher pressure blows emitters off tubing
- Inspect the filter and pressure regulator at the zone inlet monthly. A clogged filter drops pressure across the whole zone
- Flush laterals at the end cap at least twice per season
- Replace any emitter that shows cracking, deformation, or inconsistent output
Pressure-compensating emitters are worth the small price premium for any zone with elevation changes or long lateral runs. Standard emitters vary output with pressure; pressure-compensating models deliver a consistent flow rate across a range of 15–45 PSI, which means plants at the top of a slope get the same water as plants at the bottom.
Surface vs. buried lines: Surface drip tubing is easier to inspect and repair but degrades faster in UV exposure. Buried lines last longer but are harder to check. If you bury tubing, mark emitter locations with small flags or a site map so you can find them for inspection.
Treatment frequency: Flush with clean water at every seasonal transition. Treat for mineral scale once per season in areas with hard water. Treat for organic fouling (peroxide flush) once per year or if you notice slime at emitter outlets.
Pro Tip: Carry a handful of goof plugs and spare emitters on every inspection walk. When you find a blown emitter, you can cap it immediately and replace it on the spot rather than leaving a plant unwatered until your next supply run.
Troubleshooting common irrigation problems
Most irrigation problems fall into four categories: pressure issues, clogs, leaks, and electrical faults. The Oklahoma State Extension and other extension resources consistently point to routine audits as the fastest way to catch these before they compound.
Symptom-to-fix reference:
- Misting or fogging heads: pressure too high for the nozzle type. Install a pressure-reducing valve or switch to pressure-regulating heads. Check PSI at the zone valve.
- Puddling near a head: cracked head body or broken lateral. Cap the riser temporarily. Dig and inspect the lateral if the puddle persists after replacing the head.
- One zone won't run: check the solenoid wire connection at the valve. A broken wire or corroded splice is the most common cause. Test with a multimeter if you have one. Replace the solenoid ($10–$20) before replacing the whole valve.
- All zones won't run: check controller power, battery backup, and the master valve (if installed). A tripped circuit breaker on the controller transformer is easy to miss.
- Dry arc in a rotor zone: the rotor is stuck or the arc adjustment is off. Pull the head, clean the filter screen, and reset the arc with the adjustment tool.
- Low pressure across all zones: check the mainline shutoff valve (partially closed is common after any plumbing work), the backflow preventer (a failed check valve reduces flow), and the inline filter.
Finding hidden leaks:
A flow meter on the mainline is the most reliable tool. If the meter shows flow when all zones are off, you have a leak. Without a meter, look for unexplained wet spots in the lawn, especially in a straight line between valve boxes (that's where laterals run). A pressure drop of more than 5 PSI between static and operating pressure that can't be explained by zone demand is another signal.
Temporary containment: cap any open lateral with a threaded end cap. Turn off the zone at the valve box manually until the repair is complete. Never leave a broken lateral running, even overnight.
Electrical and valve faults:
- Check the controller battery first. A dead backup battery causes erratic behavior.
- Inspect wire splices in valve boxes. Corroded splices are the leading cause of zone failures in systems older than 10 years.
- Test solenoid resistance with a multimeter (typically 20–60 ohms for a healthy solenoid).
- Try opening the valve manually with the bleed screw. If it opens manually but not electrically, the solenoid is the problem, not the valve body.
When to call a professional: repeated pressure loss that returns after repair, a buried mainline break (water rising through the lawn with no heads running), pump or motor issues, or any electrical fault you can't isolate with the steps above. Preventive plumbing maintenance, including valve and mainline checks, is a category where professional oversight pays for itself in avoided emergency repairs.
What does irrigation repair and professional service cost?
Cost ranges vary by region, system size, and accessibility, but the figures below reflect typical residential irrigation service in the United States.
Common service costs:
- Basic system inspection and wet-run: $75–$150 flat fee
- Sprinkler head replacement (per head, labor included): $5–$15 for parts, $50–$100 per service call
- Valve replacement: $75–$200 per valve depending on access
- Backflow preventer testing and certification: $50–$150 (required annually in many jurisdictions)
- Winterization blowout: $75–$150 for a standard residential system
- Spring startup and inspection: $100–$200
- Buried mainline repair: $200–$600 depending on depth and pipe material
- Full system audit with distribution uniformity test: $150–$400
What drives the price up: systems with pump stations, properties with more than 10 zones, difficult access to valve boxes, or any work requiring trenching.
Hiring checklist for irrigation contractors:
- Licensed and insured in your state (irrigation contractor licensing requirements vary by state)
- References from similar-sized residential properties
- Written scope of work and itemized estimate before any work begins
- Warranty on parts and labor (30 days minimum; 90 days is better)
- Familiarity with your specific head and controller brands
For absentee owners and seasonal residents, vendor and contractor oversight through an estate management service often costs less than managing contractors remotely and catching problems only when they've become expensive.
Pro Tip: Get at least two written estimates for any repair over $300. Irrigation pricing varies widely, and a second opinion often reveals whether a "full system replacement" recommendation is actually necessary or just the path of least resistance for the contractor.
Practical upgrades that reduce water use and cut maintenance
The EPA WaterSense program identifies efficient nozzles and weather-based controllers as the highest-impact upgrades for reducing outdoor water use. These aren't luxury additions. They're the fastest way to cut both your water bill and the frequency of maintenance calls.
High-impact upgrades worth considering:
- Matched-precipitation nozzles (MP Rotators): apply water at a slower, more uniform rate than fixed sprays. They reduce runoff on slopes and improve distribution uniformity without re-zoning. Compatible with most existing heads.
- Pressure-regulating heads: built-in pressure regulation at each head eliminates the misting and overspray that comes from high-pressure zones. No separate PRV needed at the valve.
- Weather-based (smart) controllers: devices like the Rachio 3 or Rain Bird ST8I-WiFi adjust run times automatically based on local ET data, rainfall, and soil type. They eliminate the "set and forget" problem that causes most overwatering.
- Drip conversion for planting beds: converting spray zones in shrub beds to drip reduces evaporation, keeps foliage dry (reducing fungal disease), and cuts water use in those zones significantly.
- Check valves on low-head drainage zones: if you have heads at the bottom of a slope that drain after each cycle, check-valve stems prevent that low-head drainage and stop the erosion and waste it causes.
Fastest payback: smart controllers and MP Rotator nozzles consistently show the shortest payback period because they address the two biggest sources of waste (scheduling and distribution inefficiency) at relatively low cost. A smart controller upgrade typically runs $150–$300 installed and can reduce outdoor water use measurably in the first season.
Regular exterior maintenance, including irrigation upgrades, preserves curb appeal and market value in ways that deferred maintenance never recovers.
Your printable irrigation maintenance checklist and log template
Copy this checklist into a notes app, print it, or hand it to your estate manager. The Oklahoma State Extension recommends routine audits and documentation as the foundation of any effective landscape maintenance schedule.
Weekly (during active irrigation season):
- Walk drip zones after a run; look for dry emitters or pooling
- Check controller display for error codes or skipped zones
- Note any new wet spots in the lawn
Monthly:
- Run a full wet-run zone by zone and walk each zone
- Adjust controller schedule for current ET or season
- Check pressure at the mainline hose bib
- Inspect valve boxes for standing water or root intrusion
- Clean or replace drip filter cartridges if flow seems reduced
Seasonal (spring and fall):
- Perform catch-can coverage test on all zones
- Inspect and clean all nozzle screens
- Flush drip laterals at end caps
- Test and certify backflow preventer (or schedule a licensed tech)
- Inspect wiring splices in all valve boxes
- Adjust arc and radius on rotors as needed
- Update controller program for new season
Annual:
- Full system audit: pressure, flow, distribution uniformity
- Replace any head bodies showing cracking or UV degradation
- Inspect pump (if applicable) and lubrication points
- Review and update your system map with any changes made during the year
Simple maintenance log template:
| Field | Entry |
|---|---|
| Date | MM/DD/YYYY |
| Zone(s) inspected | Zone numbers |
| Issues found | Description and location |
| Parts replaced | Part name, quantity |
| Pressure reading | PSI at mainline |
| Next action needed | Task and target date |
Photo logs work well alongside written notes. A dated photo of a valve box or a head position gives you a baseline to compare against next season. Estate management providers like 30apropertycollective use digital inspection reports with photos for exactly this reason: continuity of care doesn't depend on anyone's memory.
How professional estate management raises the standard of irrigation care
There's a meaningful gap between a homeowner who runs a wet-run once a month and a professional estate partner who documents every zone, every season, with photos and a written report. Both are doing "maintenance," but the outcomes over five years look very different.
What estate-level irrigation care looks like in practice:
- Scheduled wet-runs on a fixed calendar, not when someone remembers
- Distribution uniformity audits using professional catch-can grids, not a rough visual check
- Valve box inspections that include wiring continuity checks and splice condition notes
- Pump station checks (where applicable) covering motor amperage, bearing condition, and seal integrity
- Pre-storm irrigation shutdowns and post-storm system assessments
- Vendor coordination for any repair, with written scope and follow-up verification
- Digital inspection reports with photos delivered after every visit
The difference in documentation alone changes what's possible. When a contractor claims they replaced three heads last spring, an estate manager has the photo log to confirm it. When a new technician takes over, they have a complete system history rather than starting from scratch.
When recurring oversight makes sense:
- You're away from the property for more than 30 days at a time
- The property has more than 8 irrigation zones or a pump station
- The landscape represents a significant investment (mature trees, installed turf, specimen plantings)
- You've had repeated irrigation failures that weren't caught until they caused damage
For absentee owners and seasonal residents, recurring estate oversight is the only reliable way to catch the slow failures: the emitter that's been dry for six weeks, the valve that's been partially open all summer, the controller that lost its program after a lightning strike.
Pro Tip: Ask any estate management provider for a sample inspection report before you sign. The quality of their documentation tells you more about their actual service standard than any sales conversation. A report with photos, zone-by-zone notes, and a clear next-action list is what you're paying for.
What most irrigation advice gets wrong
Most irrigation guides treat the controller as the centerpiece of the system. Adjust the schedule, they say, and you've done your job. That framing misses the real failure mode.
Controllers don't tell you whether the water is actually reaching the plants. A perfectly programmed schedule running through a zone with three clogged emitters, one broken rotor, and a partially closed valve is just a well-timed waste of water. The wet-run, the catch-can test, the physical walk-through — those are the actual maintenance. The controller is just the timer.
The second thing most guides underestimate is how fast small problems compound. A head that's sunk a half-inch below grade in April is a dead zone by July. A corroded wire splice that causes intermittent zone failures in May is a full valve replacement by September when water has been sitting in the junction box all summer. The cost of catching these things early is almost always a $10 part and 20 minutes. The cost of catching them late is a contractor visit, a landscape repair, and sometimes a water bill that makes you wince.
The third gap is documentation. Homeowners who keep even a basic log — date, zone, issue, fix — make better decisions about when to repair versus replace, and they're far better positioned to supervise contractors. An estate partner who shows up with a photo log from the last 18 months is a fundamentally different kind of oversight than someone who "checks in when they can."
The practical priority order: run the wet-run first, fix what you find, then adjust the schedule. Not the other way around.
30apropertycollective keeps your irrigation running year-round
For homeowners along Florida's Emerald Coast, the gap between a monthly wet-run and a system that quietly fails for six weeks is exactly the gap that 30apropertycollective closes. Their estate management services include scheduled wet-runs, zone-by-zone inspections with digital photo reports, vendor and contractor oversight for any repair, and seasonal startup and shutdown coordination — all on a recurring membership basis so nothing falls through the cracks while you're away.

The "set and forget" failure pattern that costs homeowners thousands in landscape damage every year is precisely what a recurring estate partner prevents. 30apropertycollective's team handles the inspection cadence, documents every finding, and coordinates licensed contractors when repairs are needed — so you're not managing it remotely or discovering a dead zone after a month away. If you're ready to hand off the oversight and know your property is covered, explore their concierge and estate services to find the plan that fits your property.
Sources
- Inspecting and maintaining irrigation systems | OSU Extension Service
- Irrigation Maintenance Checklist (Western Water CA)
- Seasonal maintenance practices for drip and sprinkler irrigation systems in Arizona (University of Arizona Cooperative Extension)
- WaterSense | US EPA