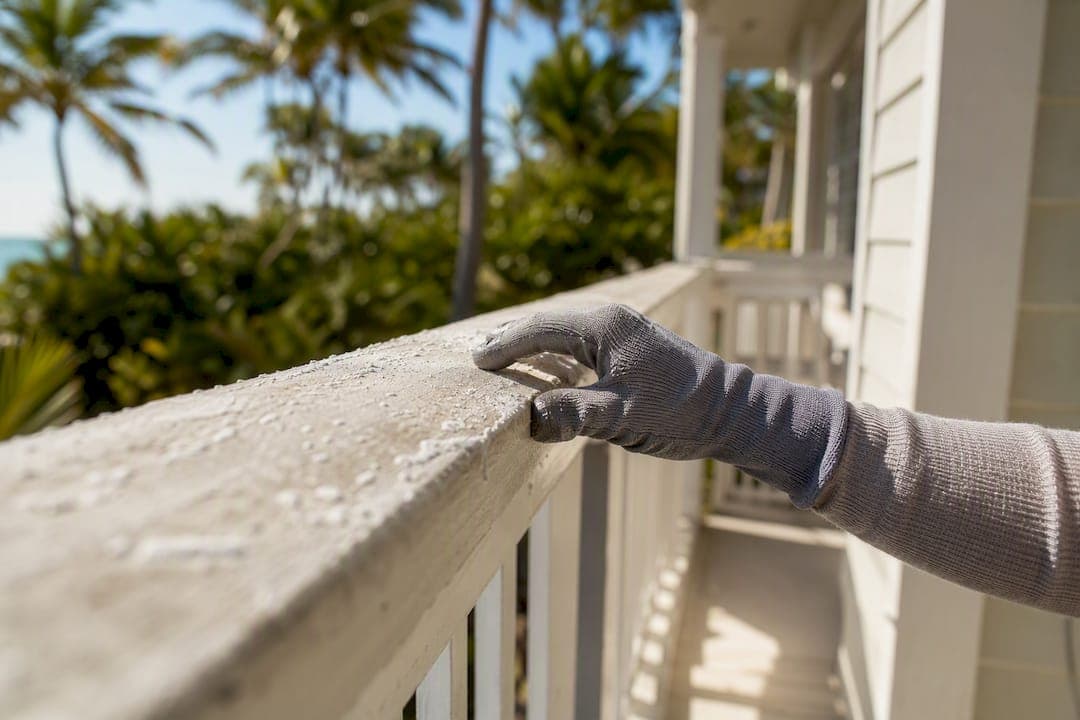
Coastal exteriors last longest when you pair thorough salt removal and substrate repair with a coastal-grade, two-coat system over the right primer. Skip either half of that equation and you're repainting sooner than you'd like. This week, do three things: rinse windward walls and any metal trim with a garden hose, walk the property looking for peeling, chalking, or rust bleed near fasteners, and photograph anything that looks off so you have a record if it worsens.
Exposed coastal walls facing direct salt spray commonly need repainting every 3 to 7 years, with proximity to the water and substrate condition driving where you land in that range. Waiting past the first signs of failure almost always costs more than acting on them.
- Soft rinse all exterior surfaces, focusing on windward elevations
- Inspect metal railings, hinges, and fasteners for rust streaks
- Check caulk lines around windows and doors for gaps or cracking
- Photograph any peeling, chalking, or blistering for a baseline record
Key Takeaways
Coastal exterior paint lasts longest when salt removal, correct primer selection, and a two-coat coastal-grade system get paired with a consistent inspection routine.
| Point | Details |
|---|---|
| Prep sequence is non-negotiable | Wash, dry fully, repair, prime, then apply two coats, in that exact order. |
| Match coating to substrate | Use 100% acrylic for siding, elastomeric for stucco, rust-inhibitive primer on metal. |
| Repaint cycles vary by exposure | Direct spray properties need repainting roughly every 4 to 5 years; set-back homes can stretch to 8 or more. |
| Inspect on a schedule, not a hunch | Annual walk-throughs plus post-storm checks catch failures while they're still cheap fixes. |
| Managed oversight extends coating life | 30A Property Collective's inspection and vendor oversight services catch early rust and caulk failure before they force an unplanned repaint. |
Table of Contents
- Why Coastal Climate Wears Down Exterior Paint Faster
- Surface-Prep Checklist for Coastal Exteriors
- Choosing Paints and Coatings for Coastal Properties
- Application Methods and Timing for Coastal Exteriors
- Inspection Schedule and Repaint Lifecycle for Coastal Homes
- When to Hire a Professional Painter for Coastal Work
- How Proactive Estate Management Protects Your Paint Investment
- Environmental Rules and Paint Disposal Along the Coast
- Frequently Asked Questions
- Sources
Why Coastal Climate Wears Down Exterior Paint Faster
Salt doesn't just sit on your siding, it actively works against the paint film. A dried salt layer blocks proper adhesion and, worse, draws moisture back in around fasteners and metal fixtures, kicking off corrosion the EPA points to as a defining feature of coastal material degradation. Add sun bouncing off water and sand, and UV exposure on south and west walls runs hotter than inland equivalents, which is why those elevations chalk and fade first.
Wind-driven rain compounds the problem. It doesn't fall straight down here, it drives sideways into seams, under trim, and through any caulk joint that's started to separate. Combine that with humidity that slows paint cure and you get blistering even on otherwise sound surfaces.
- Salt film blocks adhesion and accelerates corrosion at metal points
- UV reflected off water and sand hits south/west walls hardest
- Wind-driven rain exploits failed caulk and open seams
- Humidity slows cure time and causes blistering during application
Exposure isn't uniform across a neighborhood. A dune-line home takes direct spray, a house a few blocks back gets diluted salt drift, and a set-back property inland sees a fraction of either.
Pro Tip: Walk your property after a windy day and touch the railings. If they feel gritty or slightly tacky, that's dried salt film, and it's already working against your paint job.
Surface-Prep Checklist for Coastal Exteriors
Skipping prep is the single biggest reason coastal paint jobs fail early. Contractors who work this coastline consistently point to washing and drying as the step homeowners most often shortcut, and it's the one that matters most for adhesion.
- Soft wash first. Use low to medium pressure to strip salt, mildew, and chalk without damaging the substrate.
- Let it dry completely. Coastal humidity means 48 to 72 hours in some cases before surfaces are truly ready for primer.
- Scrape and sand. Remove all loose or flaking paint down to a sound edge.
- Repair what's damaged. Replace rotten wood sections; don't paint over soft spots hoping they'll hold.
- Treat exposed metal. Scrape rust and apply a rust-inhibitive primer before any topcoat touches it.
- Re-caulk everything. Use a flexible, marine-grade sealant on every joint, window, and door seam.
- Spot-prime. Any bare wood, chalky area, or patched section needs primer before the finish coats go on.
Before a single coat goes on, verify the sequence held: washed, fully dry, repaired, primed. Skipping the drying window is the most common shortcut that voids a paint job's expected lifespan.
- Never paint over damp substrate, even if it looks dry on the surface
- Test adhesion on a small patch before committing to the full elevation
- Document each stage with photos if you're managing a contractor remotely
Pro Tip: If you can't remember the last time your caulk was replaced, assume it's due. Failed caulk is invisible until water gets behind the paint, and by then you're looking at rot, not just a touch-up.
Choosing Paints and Coatings for Coastal Properties
Product choice matters, but only after prep is right. For most siding, 100% acrylic exterior paint remains the standard recommendation among painters working Southern coastal climates, thanks to its flexibility and UV stability. Stucco is a different story: elastomeric coatings form a flexible, waterproof membrane that bridges hairline cracks and holds up notably well in foggy or persistently damp coastal microclimates.
Primer selection is not optional detail, it's structural. Ferrous metal needs a rust-inhibitive primer or you're painting over a corrosion problem that will bleed through within a season. Cedar and other tannin-rich woods need a stain-blocking primer or you'll see yellow-brown bleed through your finish coat within months. Anything prone to trapped moisture, like north-facing trim, benefits from a moisture-resistant primer formulated for that condition.
- 100% acrylic for most siding surfaces
- Elastomeric for stucco, especially in humid or foggy zones
- Rust-inhibitive primer on all ferrous metal
- Stain-blocking primer on cedar shingles and tannin-heavy woods
On finish and color, mid-tone shades hide chalking and fading better than deep, saturated colors that show UV wear fast. Satin works well on broad wall surfaces, semi-gloss on trim. Industry testing on exterior coatings makes clear that resin quality and film thickness affect long-term durability more than brand reputation alone. For extreme exposure, ask your contractor about elastomeric membranes or specialized masonry sealants that go beyond standard paint.
Pro Tip: Ask to see the product's technical data sheet, not just the color chip. Film thickness and resin type tell you more about how long a coating will last than the name on the can.
Application Methods and Timing for Coastal Exteriors
Timing affects longevity as much as the product itself. Paint applied in high humidity or right before storm season struggles to cure properly, and a coating that never fully cures fails faster no matter how good the formula is. Aim for moderate temperatures and lower humidity windows, and avoid scheduling major exterior work during the peak of hurricane season if you can help it.
Two full coats, with proper dry time between them, isn't a luxury upsell, it's the baseline for coastal durability. A single coat leaves thin spots that salt and UV find within a year.
- Brush and roll for trim, shutters, and detail work
- Airless spray with back-rolling for siding and stucco to work the coating into the texture
- Inspect after each coat for thin spots or missed sections before applying the next
Product testing on exterior coatings shows pigment and binder performance degrade with weathering exposure over time, which is exactly why film thickness and coat count matter more here than in inland climates.
Inspection Schedule and Repaint Lifecycle for Coastal Homes
Set a rhythm and stick to it: one full walk-around inspection annually, a dedicated check after any named storm, and seasonal rinse-downs on windward walls in between. Miss the post-storm check and you risk letting wind-driven damage sit unnoticed for months.
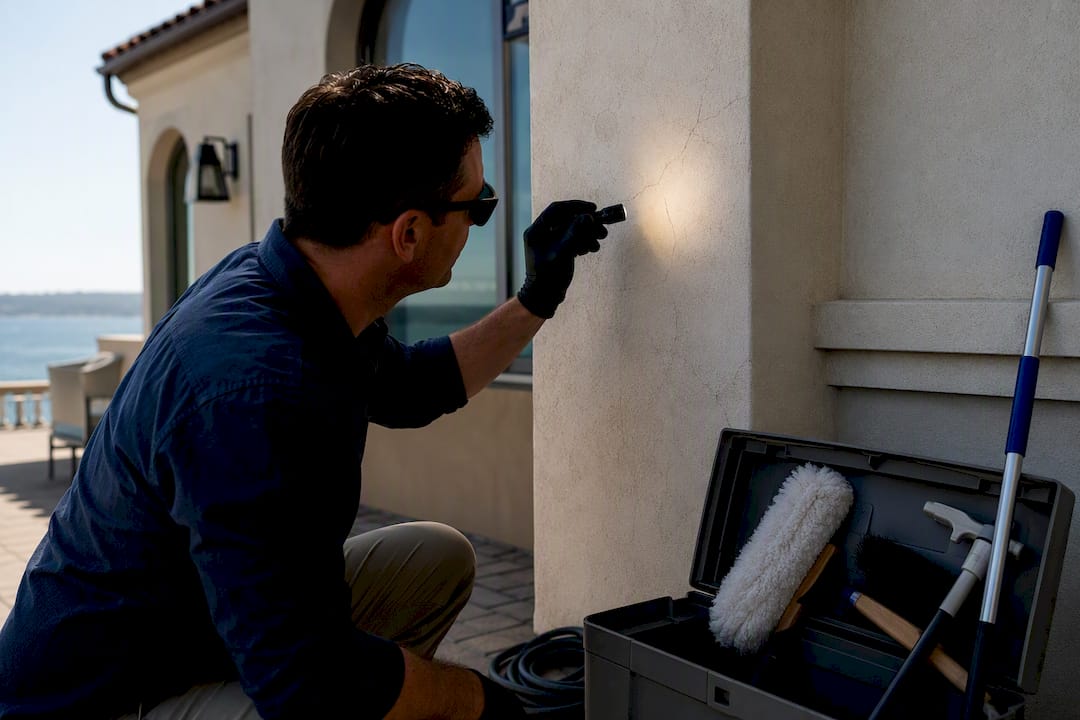
Your inspection should look for chalking that rubs off on your hand, hairline cracks in stucco, caulk pulling away from joints, and any rust streak below a fastener or railing bracket.
Repaint lifecycles vary by exposure, with direct spray properties needing more frequent attention compared to close coastal and set-back properties.
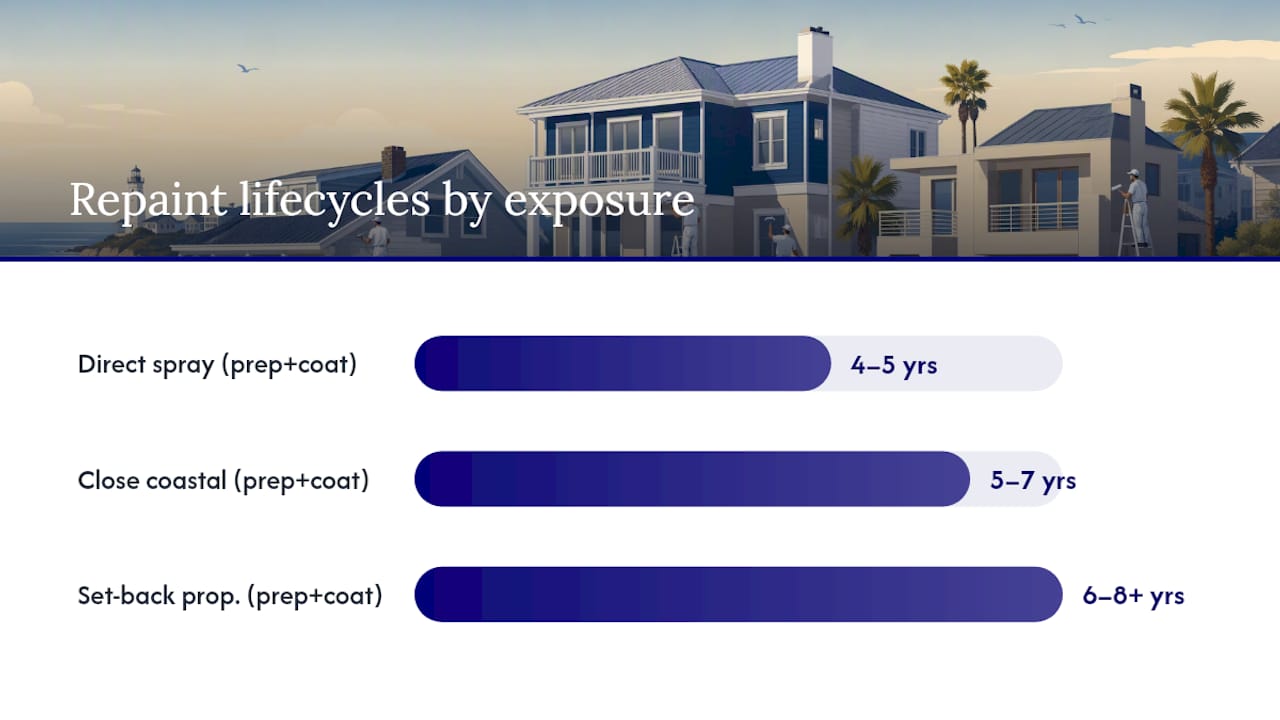
These ranges track closely with what painters across coastal markets report, and correct prep with premium coatings can push toward the upper end or beyond, while skipped prep undercuts even the best paint on the market, according to guidance on coastal-grade coating systems.
Cost varies mainly with substrate repair needs, scaffolding or lift access for multi-story elevations, premium coating selection, and how much metal work is involved. Between repaints, gentle rinse-downs, small caulk touch-ups, and a yearly check on metal for early rust bleed keep small issues from becoming full repaint triggers.
When to Hire a Professional Painter for Coastal Work
Widespread peeling across multiple elevations, soft or spongy substrate, or blistering that keeps returning after DIY touch-ups are your signal to bring in a professional rather than keep patching.
When vetting a contractor, ask pointed questions:
- Have you worked specifically on coastal or direct-spray properties before?
- What primer and coating specs do you use for stucco versus wood versus metal?
- What's your prep sequence, and will you document it?
- What warranty terms cover workmanship versus product failure?
Your contract should specify: a written prep checklist, exact product names and spec sheets (not just "premium paint"), a two-coat minimum, rust-inhibitive primer called out explicitly for any metal work, and a workmanship warranty in writing.
- Vague product descriptions with no spec sheet offered
- "One-coat" proposals for coastal exposure
- Refusal to document or photograph prep stages
- Willingness to schedule during peak storm or humidity windows
How Proactive Estate Management Protects Your Paint Investment
Most coastal paint failures don't start as paint problems, they start as a missed rust spot or a caulk gap nobody noticed for six months. Weekly or seasonal inspections catch that rust bleed, that hairline stucco crack, or that mildew patch while it's still a five-minute fix instead of a full repaint.
There's also the contractor-management side. Someone needs to confirm the prep sequence actually happened, that work got staged around favorable weather, and that the finished job meets the spec before final payment goes out.
- Early detection of rust bleed and caulk failure before they spread
- Verification that contractors followed the full prep and coating sequence
- Scheduling coordination around weather windows, not convenience
Weekly inspections and documented vendor oversight catch the small failures, a cracked seal, a rust streak, a chalking patch, before they force an early repaint. That's the difference between routine upkeep and an unplanned five-figure job.
30A Property Collective's approach to estate management builds this kind of oversight into a standing routine rather than something you remember to do once a year.
Environmental Rules and Paint Disposal Along the Coast
Coastal counties and municipalities frequently regulate what happens to paint waste, wash water, and old coatings, and the rules aren't always intuitive to a first-time DIYer. Pressure-washing runoff containing old paint chips, especially from homes built before the 1978 lead-paint ban, can't legally go straight into storm drains that lead to bays, dunes, or wetlands in most jurisdictions. Many coastal communities require containment and proper filtration during exterior prep work for exactly this reason.
Volatile organic compound (VOC) limits also tend to run stricter in coastal and southern states than the national baseline, which is part of why acrylic latex formulations dominate recommendations here. They meet lower-VOC standards while still holding up to UV and salt exposure.
Disposal of leftover paint, solvents, and scraped material typically falls under household hazardous waste rules rather than regular trash pickup. Most coastal counties run scheduled hazardous waste drop-off events or permanent collection sites, and using them isn't optional in areas near protected wetlands or dune systems.
If your home predates 1978, lead paint testing before scraping or sanding isn't a suggestion, it's a safety requirement, since disturbed lead paint dust is a genuine health hazard and often triggers specific containment and disposal protocols. A contractor with real coastal experience should know these rules cold and build them into the proposal without you having to ask.
A note from the field on coastal paint upkeep
Catching a rust streak on a railing bracket early once saved an entire elevation repaint, the fix took twenty minutes instead of a five-figure job months later. Budget attention to your metal work and windward walls first. That's where trouble starts.
Let 30A Property Collective Manage the Details for You
Staying ahead of salt damage means someone needs to actually walk the property, check the metal, and confirm the contractor did what the spec said, week after week, not just once a year. That's the gap between a homeowner with a checklist and a homeowner with a team.

30A Property Collective builds exactly this kind of oversight into its estate management plans: regular inspections that catch rust bleed and caulk failure early, vendor oversight that holds contractors to the prep sequence and product specs, and project coordination that gets exterior work scheduled in the right weather window instead of whenever a crew has an opening. Combined with documented acceptance criteria before any invoice gets paid, it turns exterior upkeep from a recurring surprise into a planned, budgeted routine. If you want a property-specific plan, start a service agreement or explore concierge project coordination to see how it fits your home.
Frequently Asked Questions
What's the best exterior paint for coastal homes? 100% acrylic performs best on most siding types, while elastomeric coatings suit stucco in humid or foggy coastal zones. Always pair the topcoat with a substrate-appropriate primer, rust-inhibitive on metal, stain-blocking on cedar.
How often should you repaint a coastal home? Direct-spray properties near the water typically need repainting every 4 to 5 years, close coastal homes every 5 to 7 years, and set-back properties every 6 to 8 years or more, depending on prep quality and coating choice.
What does exterior paint upkeep cost for a coastal property? Cost depends heavily on substrate repair needs, scaffolding for multi-story access, premium coating selection, and how much metal work needs rust treatment. Get itemized quotes rather than a single flat number so you can see what's driving the price.
Can you paint over old paint that's chalking? No. Chalking indicates a degraded surface that won't hold new paint. Wash it thoroughly, let it dry, then spot-prime before applying a topcoat.
How do you protect exterior paint between full repaints? Rinse windward walls periodically to remove salt buildup, touch up failing caulk promptly, and check exposed metal yearly for rust bleed before it spreads into the paint film.
Sources
- EPA
- Paint
- Coastal painting and salt-air durability guide · Pro 1 Painters
- Advanced guide to exterior painting in coastal California · Legacy Painting & Renovating